AntBlazor
前提
使用官方模板创建项目。
| AntBlazor 模板的引入 |
|---|
| dotnet new --install AntDesign.Templates
dotnet new antdesign -o MyAntDesignApp
|
创建 WebPaths.cs
创建 WebPaths.cs 并定义 URL 路径。图标定义使用 Ant Design Icons。详细的设置方法请参阅菜单项自定义。
| WebPaths.cs |
|---|
1
2
3
4
5
6
7
8
9
10
11
12
13
14
15
16
17
18
19
20
21
22 | using BlazorPathHelper;
[BlazorPath]
public partial class WebPaths
{
[Item("Home", Icon = "home")]
public const string Home = "/";
[Item("Sample1", Icon = "folder")]
public const string Sample1 = "/sample1";
[Item("Sample1C1", Icon = "file")]
public const string Sample1C1 = $"{Sample1}/child1";
[Item("Sample1C2", Icon = "folder")]
public const string Sample1C2 = $"{Sample1}/child2";
[Item("Sample1C2C1", Icon = "file")]
public const string Sample1C2C1 = $"{Sample1}/child2/child1";
[Item("Sample2", Icon = "folder")]
public const string Sample2 = "/sample2";
[Item("Sample2C1", Icon = "file")]
public const string Sample2C1 = $"{Sample2}/child1";
[Item("Sample3", Icon = "file")]
public const string Sample3 = "/sample3";
}
|
创建菜单组件
使用上述模板引入时,默认使用 AntBlazor.Pro 的菜单组件。
不使用 AntBlazor.Pro
创建 NavMenuItem.razor,用于显示菜单的组件。
| NavMenuItem.razor |
|---|
 1
 2
 3
 4
 5
 6
 7
 8
 9
10
11
12
13
14
15
16
17
18
19
20
21
22
23
24
25
26
27
28
29
30
31
32
33
34 | @using BlazorPathHelper
@foreach (var menuItem in MenuItems)
{
@if (menuItem.HasChildren)
{
<!-- key属性的定义可以使用 menuItem.Key -->
<SubMenu Key=@menuItem.Key>
<TitleTemplate>
<!-- Icon是object?类型,因此使用toString -->
<Icon Type=@(menuItem.Icon?.ToString()) Theme="IconThemeType.Outline" />
<span>@menuItem.Name</span>
</TitleTemplate>
<ChildContent>
<!-- 为显示子元素,递归调用 -->
<NavMenuItem MenuItems="menuItem.Children" />
</ChildContent>
</SubMenu>
}
else
{
<!-- menuItem.Path 表示菜单项的URL路径 -->
<MenuItem RouterLink="@menuItem.Path" Key=@menuItem.Key>
<Icon Type=@(menuItem.Icon?.ToString()) Theme="IconThemeType.Outline" />
<span>@menuItem.Name</span>
</MenuItem>
}
}
@inject NavigationManager NavigationManager
@code {
[Parameter, EditorRequired]
public BlazorPathMenuItem[] MenuItems { get; set; } = default!;
}
|
使用 AntBlazor.Pro
标准模板(Pro)包含从对象生成菜单的功能,但可以通过以下方式简化这些定义的生成。
| Layout/BasicLayout.razor.cs |
|---|
 1
 2
 3
 4
 5
 6
 7
 8
 9
10
11
12
13
14
15
16 | protected override async Task OnInitializedAsync()
{
_menuData = ConverterMenuDataItem(WebPaths.MenuItem);
}
private MenuDataItem[] ConverterMenuDataItem(BlazorPathMenuItem[] items)
{
return items.Select(item => new MenuDataItem {
Path = item.Path,
Name = item.Name,
Key = item.Index.ToString(),
Icon = item.Icon?.ToString(),
Children = item.HasChildren
? ConverterMenuDataItem(item.Children) : null
}).ToArray();
}
|
显示菜单
在 MainLayout.razor 中添加显示菜单的组件。
| MainLayout.razor |
|---|
| <!-- 省略 -->
<Menu Theme="MenuTheme.Dark" DefaultSelectedKeys=@(new[]{"1"}) Mode="MenuMode.Inline">
<NavMenuItem MenuItems="WebPaths.MenuItem"/>
</Menu>
<!-- 省略 -->
|
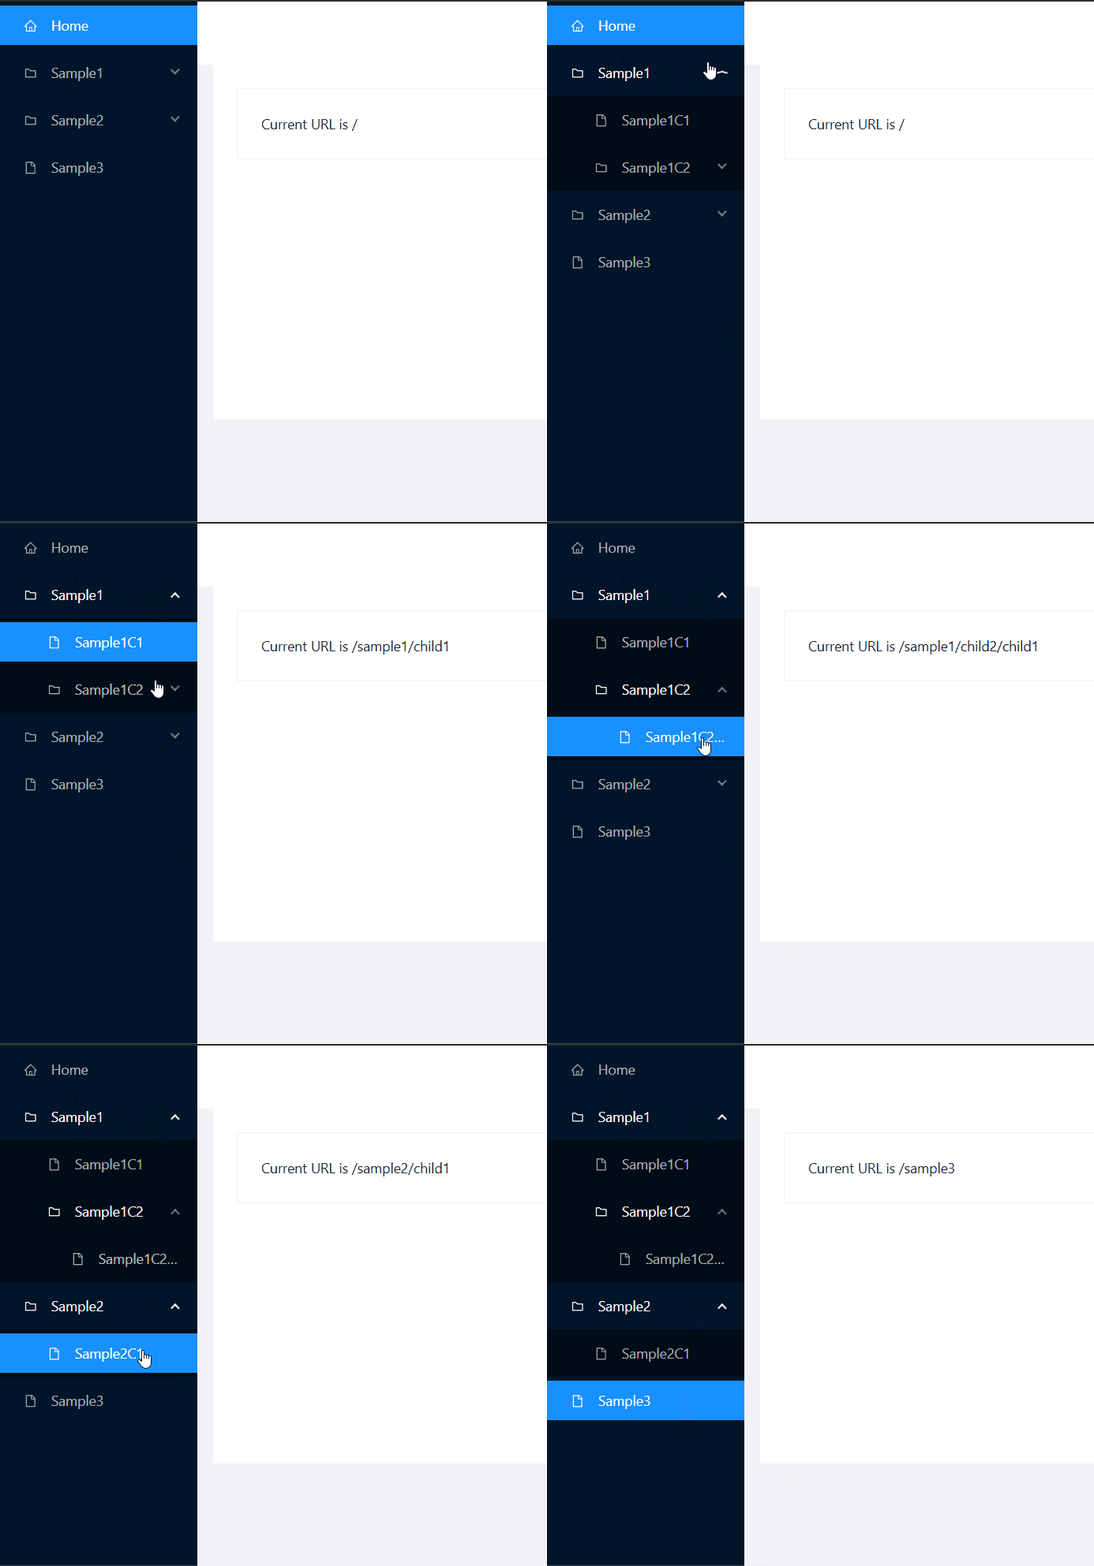
运行结果

注意事项
在此示例中,像 Sample1 这样的具有子菜单的元素没有指定链接。这是因为 AntBlazor 没有为具有子菜单的元素提供设置链接的 API。
源代码
实现示例可以在 Example.AntBlazor.Standard 和 Example.AntBlazor.Pro 中找到。
